How to Renovate a Cracked Masonry Wall
To renovate a cracked masonry wall, you will need to follow a step-by-step process.
First, identify the cause of the crack, whether it is due to settling, shifting ground, or a structural problem.
Next, clean the crack using a wire brush and a shop vacuum to remove any debris.
Then, apply a patching product such as hydraulic cement or an epoxy crack sealer.
Make sure to align, mix, and spread the product according to the manufacturer’s instructions.
Allow the product to cure for the recommended time.
For larger cracks, you may need to use a liquid concrete repair kit or polygem.
Once the crack is patched, you can feather the edges with mineral spirits and a flange to create a smooth finish.
Finally, inspect the other side of the wall for any signs of water infiltration or damage.
By following these steps, you can successfully renovate a cracked masonry wall and ensure its long-term stability.
Check this out:
Did You Know?
1. The oldest known masonry wall still standing today is the Great Wall of China, which was built over 2,000 years ago. It stretches an astonishing 13,171 miles (21,196 kilometers) and required approximately 3 million workers to construct.
2. In the United States, the world’s largest masonry dome is located at the U.S. Capitol building in Washington, D.C. It measures a breathtaking 96 feet (29 meters) in diameter and is made up of over 9 million pounds (4 million kilograms) of cast iron.
3. The ancient city of Pompeii, which was buried under volcanic ash in 79 AD, revealed fascinating masonry techniques when it was excavated. The Romans used a technique known as “opus reticulatum,” characterized by a diamond-shaped pattern in the masonry walls, creating both a beautiful and durable surface.
4. During the Middle Ages, masonry guilds were established, and their members were trained in the art of masonry. One interesting aspect of these guilds was the use of secret hand signals and gestures to communicate on construction sites, allowing masons to work together effectively without verbal communication.
5. Modern advancements in masonry wall construction include the use of carbon fiber reinforcement. This technique involves applying carbon fiber strips to the cracked areas of a wall, which greatly increases its strength and durability. It is often used to renovate and reinforce older masonry structures, ensuring their longevity for future generations.
Understanding The Causes Of Cracked Masonry Walls
Masonry walls, composed of concrete, cement, sand, and gravel, are known for their durability and longevity. However, cracks can develop over time, and it is crucial to understand the causes behind these cracks in order to effectively renovate the masonry wall.
One common cause of cracks in masonry walls is the curing process. Improper curing of concrete can result in shrinkage and hairline cracks. Another cause is settling, which occurs when the ground beneath the wall shifts or moves. This shifting ground exerts pressure on the masonry, leading to cracks and structural issues.
In addition, water infiltration can contribute to the deterioration of masonry walls. When water seeps into cracks and freezes, it causes the cracks to widen. Furthermore, the presence of insects or the accumulation of radon gas can weaken the wall’s structure, resulting in cracks.
Preparing The Surface For Repair
Before starting the renovation process, it is crucial to properly prepare the surface of the cracked masonry wall. Begin by cleaning the area using a wire brush to eliminate loose debris. Then, utilize a shop vacuum to remove any dust and particles, ensuring a clean and smooth surface for the repair.
If needed, utilize nails to align the cracked masonry for added stability. To achieve optimal results, thoroughly mix the patching product (such as hydraulic cement or an epoxy crack sealer) following the manufacturer’s instructions. Once the product is prepared, spread it evenly on the cracked wall using appropriate tools.
Selecting The Right Repair Products
Choosing the right repair products is essential for renovating a cracked masonry wall effectively. Various options are available, including the Liquid Concrete Repair Kit, Polygem, and epoxy crack sealers. It is crucial to select a product that can withstand the foundation movement and address any water infiltration issues.
For basement wall crack repair, consider using an epoxy-injection system that effectively fills and seals the cracks. Additionally, the use of plastic injection ports can facilitate the application process and provide a stronger bond. When selecting the repair product, ensure it is suitable for the specific type of masonry wall being renovated.
Steps For Patching Hairline Cracks
Hairline cracks are thin and narrow cracks in the masonry wall. To successfully patch these cracks, start by cleaning the surface with a wire brush and a shop vacuum. This step ensures that the crack is free from debris and dust.
Next, use a caulk gun to dispense LCR epoxy into the crack. Apply the epoxy until it starts oozing out from the crack. Then, insert plastic injection ports along the length of the crack, spacing them approximately 6 to 8 inches apart. Once the epoxy has cured, plugging the ports ensures a seamless finish.
Repairing Larger Cracks And Structural Problems
To address larger cracks and structural issues in masonry walls, a different approach is necessary. Here’s a step-by-step guide for effective repair:
-
Cutting the crack: Begin by using a hacksaw to create a wider groove along the crack. This enhances the adhesion of the repair material.
-
Cleaning the crack: To eliminate any loose debris, thoroughly clean the crack with a wire brush and a shop vacuum.
-
Mixing the hydraulic cement: Follow the instructions provided by the manufacturer to mix the hydraulic cement with water. The ratio may vary based on the desired consistency and severity of the crack. For larger cracks, it is advisable to use a stiffer mixture.
-
Applying the hydraulic cement: Carefully fill and level the crack with the mixed hydraulic cement. Be sure to apply enough cement to adequately fill the crack and create a smooth surface.
-
Repairing missing mortar in brick walls: For sections with missing mortar, use a mortar mix to recreate the absent areas. With a trowel, apply the mortar mix while feathering the edges. This technique ensures a seamless integration with the existing mortar.
-
Curing the repaired area: Allow the repaired section to cure for the recommended duration before proceeding to the next steps. This will help the repair material to properly set.
Remember, following these instructions will help you effectively repair larger cracks and structural problems in masonry walls.
Finishing And Long-Term Maintenance Of Renovated Walls
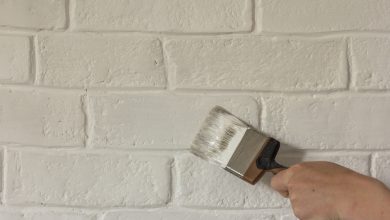
Once the structural issues and cracks have been addressed and patched, it is crucial to finish the renovated masonry wall appropriately. To start, clean any spills or smudges on the wall’s surface using mineral spirits.
Inspect the other side of the wall for any signs of leakage and promptly address them.
To enhance the aesthetics of the renovated wall, lightly sand the surface to achieve a smooth texture. If desired, colored sand or pigments can be added to the patching product to match the existing wall color, ensuring a seamless blend and visually pleasing result.
Just like any renovation project, long-term maintenance is essential for the masonry wall. Regular inspections and maintenance can help identify and address any potential defects or new cracks promptly. It is also important to prioritize the repair of damaged driveways or brick walls to prevent further deterioration.
In conclusion, renovating a cracked masonry wall requires a comprehensive understanding of the causes, proper surface preparation, and selection of suitable repair products. By following a step-by-step guide, homeowners can successfully patch hairline cracks, address larger cracks, and solve structural problems. Through proper finishing and long-term maintenance, the renovated wall can maintain its strength and integrity for years to come.
- Clean any spills or smudges on the wall’s surface using mineral spirits.
- Lightly sand the surface to achieve a smooth texture.
- Consider adding colored sand or pigments to the patching product for a seamless blend.
- Regularly inspect and maintain the masonry wall to address any potential defects or cracks promptly.
- Prioritize the repair of damaged driveways or brick walls to prevent further deterioration.
Frequently Asked Questions
Can a cracked concrete wall be repaired?
Yes, a cracked concrete wall can be repaired using an Epoxy-Injection System. This system consists of a two-part epoxy crack sealer and Liquid Concrete Repair (LCR), which is a viscous epoxy. The LCR is injected deep into the crack using plastic injection ports, effectively sealing and repairing the cracked wall. This method ensures a strong and durable repair that prevents further damage to the concrete structure.
Can a cracked block wall be repaired?
Yes, a cracked block wall can be effectively repaired using ElastiPoxy™ Joint & Crack Filler mixed with sand. This superior cement crack filler solution offers a reliable and permanent fix for cracks or defects in walls or slabs. Its strong adherence to concrete ensures a sturdy and rigid repair that is even stronger than the original concrete. With ElastiPoxy™, the cracked block wall can be successfully restored to its former strength and integrity.
What material to repair wall cracks?
To effectively repair wall cracks, one can utilize a combination of materials readily available. Begin by applying drywall tape over the spider or narrow cracks, ensuring secure adhesion. Then, utilize joint compound to fill the gaps and create a smooth surface. Lastly, utilize sandpaper to carefully sand the compound, restoring the wall to its original evenness. This simple method for wall crack repair proves that specialized plaster repair kits are unnecessary; anyone can achieve a seamless wall fix with easily accessible materials.
What is the main reason for cracks in masonry?
The main reason for cracks in masonry is the initial shrinkage that occurs in cement-based building materials. This shrinkage, which is partly irreversible, is a natural process that happens in materials like concrete, mortar, masonry units, and plaster. As these materials dry, they undergo shrinkage, leading to cracks in the structure. This phenomenon is a common cause of cracking in masonry, highlighting the inherent nature of initial shrinkage in cement/lime based components.