How to Install Wainscoting
To install wainscoting, start by removing any existing fixtures and preparing the wall.
Plan and measure the wall to determine the number of panels needed.
Cut the wainscoting panels to size and make any necessary holes for outlets or switches.
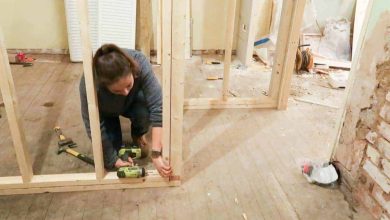
Attach baseboards and then use construction adhesive and brad nails to secure the wainscoting panels to the wall.
Trim the top of the panel with decorative trim and fill any nail holes.
Caulk the edges of the panels and apply a moisture and mildew-resistant primer.
Finally, paint the panels using a suitable paint and caulk the edge that touches the shower tile in bathroom installations.
Check this out:
Did You Know?
1. Did you know that wainscoting originated from the Dutch word “wagenschot,” which means “wagon partition”? This term was used because wainscoting was initially used to line the walls of wagons to prevent damage during transportation.
2. Ancient Greeks used to decorate their wainscoting panels with intricate patterns and scenes from mythology. These designs were carved into the wood using specialized techniques, making each panel a unique work of art.
3. Wainscoting was not only used for aesthetic purposes but also served as insulation in medieval homes. By placing a layer of wainscoting on the lower part of the walls, people were able to keep their living spaces warmer during colder months.
4. In the 18th century, wainscoting became a symbol of wealth and social status. Wealthy households would often install elaborate wainscoting made from expensive woods, showcasing their prosperity to visitors.
5. During the Victorian era, it became fashionable to incorporate hidden compartments within wainscoting. These secret compartments were used to store valuable items, important documents, or even hideaway spots for those seeking privacy.
Materials Needed For Installing Wainscoting Panels
Before you start installing wainscoting panels, it is important to gather all the necessary materials. Here’s a list of what you’ll need:
-
Wainscoting panels made from medium density fibers (MDF): These panels are perfect for wainscoting as they are durable, affordable, and easy to work with.
-
Graph paper for drawing the wall to scale: This will help you plan and measure the entire wall accurately, ensuring that you have the right amount of panels for installation.
-
Construction adhesive: This will be used to secure the wainscoting panels to the wall.
-
Brad nails: These small nails are ideal for attaching the panels to the wall, providing additional support and stability.
-
Table saw or circular saw with a rip fence: You’ll need one of these tools to cut the wainscoting panels to size accurately.
-
DAP Premium Wood Filler: This filler will come in handy to fill the nail holes and any other imperfections in the wainscoting.
-
DAP Alex Flex caulking: This caulking will be used to seal the edges of the panels, giving them a finished look.
-
DAP Kwik Seal Ultra caulk (for bathroom installation): If you plan to install wainscoting panels in a bathroom, using this caulk will provide added protection against moisture and mildew.
-
Moisture and mildew-resistant primer: Apply this primer to the panels before painting to ensure the longevity of the wainscoting.
-
Behr Marquee paint: This high-quality paint will give your wainscoting panels a smooth and beautiful finish.
Steps To Install Wainscoting Panels
Now that you have all the necessary materials, let’s dive into the steps for installing wainscoting panels:
-
Step 1: Prepare the room by removing any fixtures or accessories that may obstruct the installation, such as the toilet, sink top, bathtub, floor, and drywall. This will ensure that you have a clean and empty canvas to work with.
-
Step 2: Plan and measure the entire wall where you want to install the wainscoting. Using graph paper, draw the wall to scale, taking into account any obstacles like windows or doors. This will help you determine the number of panels needed for installation.
-
Step 3: Acclimate the wainscoting panels in the room for 48 to 72 hours before installation. This will allow the panels to adjust to the room’s temperature and humidity, reducing the risk of warping or shrinking after installation.
-
Step 4: Using a table saw or circular saw with a rip fence, cut the wainscoting panels to the desired size. Measure carefully and double-check your measurements to ensure accuracy.
-
Step 5: If necessary, cut holes in the panels for outlets or light switches using the appropriate tools. This step is crucial to ensure that the panels fit snugly around these fixtures.
-
Step 6: Before securing the wainscoting panels, attach the baseboards to the wall. This will create a solid foundation for the panels and give your wainscoting a more finished look.
-
Step 7: Apply construction adhesive to the back of each wainscoting panel and press it firmly against the wall. Additionally, secure the panels with brad nails, ensuring that they are evenly spaced. This combination of adhesive and nails will provide a strong and secure bond.
-
Step 8: Trim off the top of each panel with decorative trim, such as chair rail molding. Use a brad nailer to attach the trim to the top of the panel, creating a visually appealing and cohesive look.
-
Step 9: Fill any nail holes and imperfections in the wainscoting panels with DAP Premium Wood Filler. Allow the filler to dry for approximately two hours before sanding it down for a smooth finish.
-
Step 10: To give your wainscoting a polished appearance, caulk the edges of the panels using DAP Alex Flex caulking. This will create a seamless transition between the panels and the wall.
-
Step 11: If you are installing wainscoting panels in a bathroom, use DAP Kwik Seal Ultra caulk for the edge that touches the tile or shower. This caulk is specially formulated to resist moisture and mildew, ensuring the durability of your wainscoting.
-
Step 12: Apply an additional coat of moisture and mildew-resistant primer to the panels. This step will further protect the wainscoting from moisture damage, especially in high-humidity areas like bathrooms.
-
Step 13: Finally, paint the wainscoting panels with Behr Marquee paint or the paint of your choice. Select a color that complements your overall interior design scheme and apply multiple coats for a flawless finish.
-
Step 14: For added protection in bathroom installations, caulk the edge that touches the shower tile with DAP Kwik Seal Ultra. This will create a watertight seal and prevent any moisture from seeping behind the wainscoting.
Additional Information And FAQs About Installing Wainscoting Panels
-
Wainscoting is a type of wood paneling that covers the lower portion of walls for protection and insulation. It adds visual interest and elegance to any room.
-
It can be installed with construction adhesive and nails, and can be installed above baseboards for a more traditional look.
-
The recommended height for wainscoting is usually the lower 1/3rd of the walls, with additional trim added to the top for a finished appearance.
-
While white is a traditional color for wainscoting, you can choose any color that complements your home’s decor and style.
-
Wainscoting is commonly used in dining rooms, living rooms, and entryways, but it can be installed in any room to enhance its aesthetic appeal.
-
Wainscoting is different from beadboard and board and batten as it consists of horizontal and vertical wood pieces with decorative trim, creating a more intricate design.
-
Installing wainscoting panels in a bathroom is relatively easy and affordable. Follow the same steps mentioned earlier and ensure that you use moisture and mildew-resistant materials for added durability.
Methods For Installing Beadboard Wainscoting
There are two common approaches for installing beadboard wainscoting:
-
Replace the existing drywall with 1/2″ plywood: This method provides a thicker base for the wainscoting and is ideal for laundry or mudrooms. However, it may require some experience and could potentially violate fire codes in certain areas. Consult your local building codes before undertaking this method.
-
Glue and nail the beadboard panel to the existing drywall: This is a quicker and more cost-effective installation method. Simply apply construction adhesive to the back of the beadboard panel and press it firmly against the drywall. Use finishing nails to secure the panel in place, and finish the installation with a chair rail and trim attached with larger finishing nails to enhance durability.
Installing wainscoting panels can transform the look and feel of any room in your home. By following the step-by-step guide and using the recommended materials, you can achieve a professional and beautifully finished result.
- Whether you choose to install wainscoting in a traditional or contemporary style, it is sure to add charm and elegance to your living space.
Frequently Asked Questions
Do you glue or nail wainscoting?
When it comes to installing wainscoting, the preferred method is the glue-and-nail approach. This technique involves applying an adhesive to the wainscot panel, securing it in place, and then using either fine finishing nails or a pneumatic pin nailer to affix it to the drywall. By combining the strength of adhesion with the added support of nails, this method ensures a sturdy and durable installation that is both efficient and cost-effective.
Is wainscoting easy to install?
While the idea of installing wainscoting may initially appear daunting, it is indeed an easily achievable task. Even for beginners, DIY wainscoting is a viable option that offers a sense of accomplishment. Not only is it approachable for those new to home improvement, but it also significantly reduces the overall cost compared to hiring a professional. With some dedication and patience, wainscoting installation can be a rewarding and cost-effective project.
What is the purpose of wainscoting?
The primary purpose of wainscoting is to serve as a protective layer for walls, safeguarding them against potential damage caused by furniture and shoes. By acting as a barrier, wainscoting prevents scuff marks and other signs of wear and tear, ensuring the longevity and durability of the walls. However, beyond its practical function, wainscoting also adds a touch of visual appeal to a space. With its elegant and timeless design, wainscoting enhances the overall aesthetic of a room, becoming a stylish and decorative element that complements the surrounding interior.
Can I glue wainscoting to wall?
Yes, it is possible to glue wainscoting to a wall using a suitable adhesive such as Loctite PL 505 Paneling and Trim Adhesive. This adhesive is specially designed to work on a variety of surfaces, including wood and drywall panels. With its water-based formula, it ensures a strong bond between the wainscoting material and the wall. However, it is important to ensure that at least one of the surfaces being glued is porous, such as wood or drywall panels, to achieve optimal adhesion.