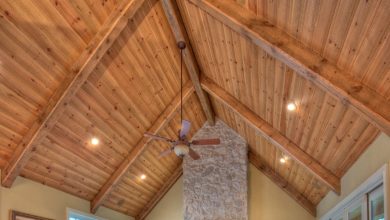
How to Install Vinyl Soffit
To install vinyl soffit, begin by installing aluminum flashing.
Next, fasten a nailer for the soffit panels to the wall and snap a line on the wall to guide the installation.
Fasten the nailer on and above the line.
Cut the vinyl soffit panels slightly shorter than the distance between the wall and the subfascia.
Nail the first soffit section to the subfascia and the nailer, and tack the other side with a nail.
Hook the buttlock of the second section into the flange of the first piece, and continue until the soffit is complete.
Trim the last piece and account for thermal expansion by cutting the vinyl about 1/2 inch shorter.
Make sure to consult local building codes for proper ventilation requirements and use aluminum flashing for corners and beyond.
Install soffit before the final course of siding is installed, and remember that soffit installation determines the positioning of corner posts.
Check this out:
Did You Know?
1. Did you know that vinyl soffit was developed in the 1950s as an alternative to wood soffit, due to its durability and low maintenance?
2. Prior to the invention of vinyl soffit, homeowners had to regularly paint or stain their wooden soffits to protect them from weather damage.
3. While vinyl soffit is commonly used to improve the aesthetics of a home, it also serves an important functional purpose by providing ventilation for the attic, preventing moisture buildup and potential structural damage.
4. In order to install vinyl soffit, it is recommended to start from the bottom and work your way up, ensuring a secure fit and proper alignment.
5. When choosing vinyl soffit, it is important to consider the temperature range of your region, as extreme heat or cold can cause the material to expand or contract. Opting for a thicker vinyl soffit may be advantageous in areas with more extreme weather conditions.
Install Aluminum Flashing
Before you can begin installing the vinyl soffit panels, it is essential to install aluminum flashing first. This will help protect the soffit from water damage and ensure a secure installation. Take your time during this step to ensure the flashing is properly aligned and securely fastened.
Fasten Nailer For Soffit Panels
Next, fasten a nailer for the soffit panels to the wall. The nailer acts as a support structure and provides a surface to attach the soffit panels to. Position the nailer at a suitable height, considering factors such as the height of the subfascia and the desired appearance of the soffit.
- Fasten a nailer for soffit panels to the wall
- Position the nailer at a suitable height
- Consider the height of the subfascia and desired appearance of the soffit
Snap A Line On The Wall
To ensure that your soffit panels are installed straight and level, it is crucial to snap a line on the wall. This line will serve as a guide when positioning the nailer and installing the soffit panels. Use a level to ensure the line is perfectly straight before proceeding further.
Fasten Nailer On And Above The Line
Once you have snapped a line on the wall, fasten the nailer both on and above the line. This will ensure that the soffit panels can be securely attached to the wall and provide a clean and polished appearance. Use appropriate fasteners to secure the nailer, ensuring its stability.
Cut Vinyl Soffit Panels
Before installing the vinyl soffit panels, it is necessary to cut them to the appropriate size. Here are the steps to follow:
- Measure the distance between the wall and the subfascia.
- Cut the panels slightly shorter than this distance.
- Account for thermal expansion during installation by cutting the vinyl about 1/2 inch shorter.
Remember, it is important to accurately measure and cut the panels to ensure a proper fit and prevent any issues with thermal expansion.
- Measure the distance between wall and subfascia
- Cut panels slightly shorter
- Account for thermal expansion by cutting the vinyl about 1/2 inch shorter
Installing vinyl soffit panels requires proper sizing and considerations for thermal expansion.
Nail First Soffit Section
With the nailer in place and the panels cut to size, it is time to start installing the vinyl soffit. Begin by nailing the first soffit section to the subfascia and the nailer. Ensure that the panels are securely attached but leave room for expansion. Use appropriate nails that are designed for vinyl soffit installation.
Continue to tack the other side of the first piece of soffit with a nail for added stability. This will help keep the soffit in place while you install the remaining sections. Once the first piece is securely installed, you can move on to the next step.
Remember to hook the buttlock of the second section into the flange of the first piece when installing subsequent sections. This interlocking mechanism ensures a tight fit and provides added strength and stability to the overall soffit structure. Repeat this process until the soffit is complete, ensuring a secure connection between all the sections.
Conclusion
Installing vinyl soffit can be a relatively straightforward process with proper guidance and preparation. By following the steps outlined in this guide, you can confidently install vinyl soffit on your home’s exterior.
Here are some key points to keep in mind:
-
Consult local building codes for proper ventilation requirements. Vented soffit or other vented products may be necessary for adequate attic ventilation.
-
Ensure that the soffit installation is completed before the final course of siding is installed on the wall. This will help in determining the positioning of corner posts.
Here are some steps to follow for successful vinyl soffit installation:
-
Install aluminum flashing to prevent water infiltration and protect the underlying structure.
-
Fasten a nailer along the bottom edge of the wall. This will serve as a support for the soffit panels.
-
Snap a line on the wall to ensure the soffit panels are straight and level. This will help in achieving a professional-looking finish.
-
Cut the soffit panels correctly according to the measurements. Take into consideration thermal expansion to leave sufficient space for movement.
Remember to consider thermal expansion, consult local building codes, and use appropriate materials throughout the installation process. By following these guidelines, you can enjoy the benefits of a well-installed vinyl soffit for years to come.
So, to summarize the installation process:
- Consult local building codes for ventilation requirements.
- Install vinyl soffit before the final course of siding.
- Install aluminum flashing.
- Fasten a nailer for support.
- Snap a line for accuracy.
- Cut the soffit panels correctly, considering thermal expansion.
Frequently Asked Questions
What holds vinyl soffit in place?
To hold vinyl soffit in place, F-Channel is commonly used. This trim piece, made of either aluminum or vinyl, secures the soffit outside of the panel and attaches it firmly to the wall. The F-Channel’s design provides a secure and stable hold, preventing the soffit from shifting or becoming loose over time.
What is the thickness of vinyl soffit?
Vinyl soffit typically has a standard panel thickness of .040 inches. This thickness ensures durability and strength while providing a beautiful and appealing look. With its multiple colors, wood emboss, and low gloss finish, the double 5″ standard vinyl soffit offers both visual appeal and high quality for any home or building project.
What is the purpose of vinyl soffit?
Vinyl soffit serves the purpose of temperature regulation and moisture control in attic spaces. It effectively mitigates the effects of heat and moisture trapped in overhangs, preventing paint from peeling. Georgia-Pacific® Vinyl Siding and Accessories provide vinyl soffit panels that offer a hassle-free solution to this problem, ensuring low maintenance for homeowners.
What are the steps for installing vinyl soffit around the perimeter of a house?
The steps for installing vinyl soffit around the perimeter of a house are as follows:
1. Measure and calculate the amount of vinyl soffit needed for the project. This can be done by measuring the length and width of each side of the house and calculating the total square footage.
2. Start by installing J-channel along the edges of the house where the soffit will be installed. This provides a channel for the soffit panels to fit into.
3. Cut the vinyl soffit panels to the appropriate size, using a saw or utility knife. Trim any excess or unnecessary parts.
4. Slide the soffit panels into the J-channel, starting at one corner of the house and working your way around. Ensure that the panels fit snugly into the channel and are securely attached.
5. Continue installing the remaining soffit panels, making sure to overlap the joints properly to create a seamless appearance.
6. Lastly, install the fascia board at the bottom of the soffit to complete the installation, ensuring it is securely fastened.
By following these steps, you should be able to successfully install vinyl soffit around the perimeter of a house.