How to End Baseboard at Stairs
To end baseboard at stairs, you will need to follow a few steps.
First, measure the stairs to determine the length needed for the baseboard.
Then, cut the baseboard at a 45-degree angle to fit the corner of the stairs.
Next, apply glue and nail the baseboard in place.
Paint or stain the baseboard to match the stairs, and seal any gaps with caulk or silicone sealant.
Baseboards are important for a polished look and serve as boundaries for stairs.
They also protect walls from damage.
Use the proper tools, such as a miter saw, and consider using L-shaped molding for the baseboard-to-stair riser connection.
Ensure a seamless transition between levels and secure the baseboard firmly.
Regularly clean the baseboards and promptly repair any cracks or damage.
For more detailed instructions, visit [link to more instructions on home maintenance].
Check this out:
Did You Know?
1. In architecture, the baseboard at the bottom of stairs is known as a “starting step” or a “bullnose step,” designed to transition smoothly between the staircase and the flooring.
2. Did you know? The term “baseboard” originally referred to a wooden board placed at the base of a wall to protect it from furniture, but over time, it evolved to encompass decorative and functional purposes.
3. The molding used to end baseboards at stairs is called a “stair nosing,” a specialized trim that adds both aesthetic appeal and safety by providing a finished edge and preventing slips or trips.
4. Interestingly, the height and design of baseboards at stairs may vary depending on local building codes and safety regulations, as different regions might have specific requirements to ensure the utmost protection and usability.
5. Historically, Victorian-era homes often featured intricately carved wooden baseboards near staircases, showcasing the craftsmanship and attention to detail prevalent during that era. Today, these antique baseboards at stairs are highly sought after by architects and homeowners alike, adding a touch of vintage charm to modern interiors.
Steps To End Baseboard At Stairs
When it comes to ending baseboard at stairs, it is essential to follow the proper techniques to ensure a polished and seamless finish. Here are the steps to guide you through the process:
-
Start by measuring the length of the stairs to determine the amount of baseboard needed. It is crucial to measure accurately to avoid any shortage or wastage of materials. Take into consideration any corners or turns in the stairs that may require additional baseboard pieces.
-
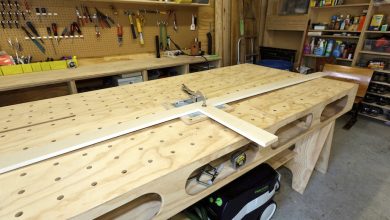
Cut the baseboard at a 45-degree angle at the end where it meets the stairs. This angled cut allows for a clean and professional-looking joint. Use a miter saw to ensure precision in cutting the baseboard at the correct angle.
-
After cutting the baseboard, apply a quality adhesive to ensure a strong and durable bond. Apply the adhesive on the backside of the baseboard and press it firmly against the wall, aligning it with the edge of the stairs. To secure it further, use finishing nails to secure the baseboard in place. Remember to countersink the nails to ensure they are not visible once the baseboard is painted or stained.
-
Measure the length of the stairs accurately
- Cut the baseboard at a 45-degree angle
- Use a miter saw for precise cutting
- Apply adhesive on the backside of the baseboard
- Press firmly against the wall, aligning with the edge of the stairs
- Secure with finishing nails, countersinking them for a seamless finish.
Measurement Of Stairs For Baseboard
Accurate measurement of the stairs is crucial when determining the quantity of baseboard required for a seamless finish. Here’s how to measure the stairs for baseboard installation:
- Start by measuring the length of each individual stair tread. Measure from one edge of the tread to the other, ensuring that your measurement follows the contour of the stair.
- Add all the measurements together to determine the total length of baseboard needed for the stairs.
Additionally, measure the height of the riser, which is the vertical part between each tread. This will help determine the appropriate height of the baseboard needed to cover the riser completely.
Remember to account for any corners, turns, or angles in the stairs when taking measurements. It is recommended to add a few extra inches to your measurements to account for any errors or adjustments needed during installation.
Cutting Baseboard At A 45-Degree Angle
One of the essential techniques for ending baseboard at stairs is cutting it at a 45-degree angle. This angled cut allows for a seamless joint and a professional finish. Here’s how to cut baseboard at a 45-degree angle:
-
Measure the width of the baseboard where it meets the edge of the stairs. Transfer this measurement onto the baseboard and mark it with a pencil or a marker.
-
Use a miter saw to make the angled cut. Set the saw at a 45-degree angle and position the baseboard against the saw fence. Align the mark with the blade and carefully cut through the baseboard. Ensure that you are cutting on the correct side of the mark to achieve the desired angle.
-
Remember to measure and cut each baseboard piece individually as the angles may vary depending on the stair design. It is recommended to double-check the angles before making any cuts to ensure accuracy.
Gluing And Nailing Baseboard In Place
To ensure a secure and long-lasting installation, it is crucial to use both adhesive and nails to attach the baseboard to the stairs. Here’s how to glue and nail baseboard in place:
-
Start by applying a high-quality adhesive to the backside of the baseboard. Apply it evenly across the surface to ensure a strong bond. Press the baseboard firmly against the wall, aligning it with the edge of the stairs.
-
Next, use finishing nails to secure the baseboard in place. Space the nails evenly along the length of the baseboard, making sure to countersink them slightly below the surface. This will allow for a smooth finish once the baseboard is painted or stained.
-
Make sure to use an appropriate size and type of nails for your baseboard. Finishing nails or brad nails are commonly used due to their small size and minimal visibility once the installation is complete.
Painting Or Staining Baseboard To Match Stairs
After the baseboard is securely in place, it is important to paint or stain it to match the stairs. Here are the steps to effectively paint or stain the baseboard:
-
Clean the baseboard: Start by ensuring there is no dust or debris present on the surface. Use a mild detergent and water solution to clean the baseboard, then allow it to dry completely.
-
Prime the baseboard: If you choose to paint the baseboard, it is recommended to prime it first for better adhesion and coverage. Apply a coat of primer and let it dry according to the manufacturer’s instructions.
-
Paint the baseboard: Once the primer is dry, apply the desired paint color using a brush or roller. Make sure to apply multiple coats if necessary, allowing each coat to dry before applying the next.
-
Stain the baseboard: If you prefer to stain the baseboard, start by lightly sanding it to create a smooth surface for the stain to adhere to. Wipe away any dust or debris from sanding. Apply the stain in the direction of the wood grain using a brush or cloth. Allow the stain to penetrate the wood for the recommended time, then wipe away any excess stain with a clean cloth. Apply additional coats if you desire a darker color.
-
Allow for complete drying: Lastly, it is crucial to allow the paint or stain to dry completely before handling or placing any objects near the baseboard. This will ensure a durable and uniform finish that seamlessly matches the stairs.
Sealing Gaps With Caulk Or Silicone Sealant
To achieve a professional and polished look, it is important to seal any gaps or cracks between the baseboard and the stairs. Here is how to seal gaps with caulk or silicone sealant:
- Start by cleaning the area between the baseboard and the stairs. Remove any dirt, dust, or debris to ensure a proper bond with the sealant.
- Next, choose a high-quality caulk or silicone sealant that matches the color of the baseboard. Apply a bead of sealant along the entire length of the baseboard where it meets the stairs. Use a caulk gun or a small putty knife to smooth out the sealant and ensure a clean finish.
- Once the sealant has been applied, allow it to dry according to the manufacturer’s instructions. This will typically take a few hours or overnight, depending on the product used.
- Inspect the sealed gaps once the sealant is dry to ensure there are no visible cracks or imperfections. Make any necessary touch-ups or reapplications if required.
Sealing the gaps not only improves the visual appearance but also prevents dust, dirt, and insects from entering the spaces between the baseboard and the stairs. It also helps to reduce drafts and increase energy efficiency.
Properly ending baseboard at stairs is crucial for achieving a polished and seamless finish.
In conclusion, by following the steps outlined above, you can achieve a professional look that enhances the overall aesthetic of your staircase. Proper baseboard installation not only adds to the visual appeal but also provides a protective function for both the walls and the stairs. Remember to clean and inspect your baseboards regularly, addressing any cracks or damage promptly. With a little bit of DIY know-how and attention to detail, you can master the technique of ending baseboard at stairs and create a stunning transition between two levels in your home.
- Clean the area between the baseboard and the stairs
- Choose a high-quality caulk or silicone sealant
- Allow the sealant to dry
- Inspect and make necessary touch-ups or reapplications.
Frequently Asked Questions
What is the rule for baseboard trim?
While there is no strict rule concerning the height of baseboard trim relative to the ceiling, a general guideline suggests a 1:12 ratio. This means that for every 12 inches of ceiling height, there should be approximately one inch of baseboard. Though this ratio is not set in stone, it serves as a useful reference when determining the appropriate height for your baseboards.
1. What are some creative ways to seamlessly end baseboard trim at the bottom of stairs?
One creative way to seamlessly end baseboard trim at the bottom of stairs is to make use of a decorative corner block or rosette. These blocks can be installed at the bottom of the stairs where the baseboard meets the adjacent wall, providing a smooth and elegant transition. The corner block or rosette can be chosen to complement the style of the baseboard trim, creating a cohesive and visually appealing finish.
Another option is to utilize a custom-made transition piece. This could involve creating a curved or angled trim piece that fits seamlessly between the baseboard trim and the stair riser. The custom piece can be crafted to follow the contour of the stairs, allowing for a clean and integrated look. Additionally, the transition piece can be stained or painted to match the baseboard trim, enhancing the overall aesthetic appeal of the staircase.
2. Are there any special considerations or techniques for ending baseboard trim at the top of stairs?
Yes, there are a few special considerations and techniques when ending baseboard trim at the top of stairs. One important consideration is to ensure that the baseboard trim is cut and measured correctly to align with the angle of the stairs. Since the angle of the stairs is typically not a standard 90-degree angle, the baseboard trim needs to be mitered or beveled to fit properly at the top of the stairs. This may require measuring and cutting the trim at an angle to ensure a seamless and snug fit.
Another technique to consider is using a transition piece or molding to smoothly transition the baseboard trim from the stairs to the adjacent wall. These transition pieces can help to create a clean and finished look, hiding any gaps or uneven edges between the trim and the wall. It is important to ensure that the transition piece is securely attached and properly aligned to maintain a professional and polished appearance.
3. What tools and materials are needed to properly end baseboard trim at stairs, and how can beginners accomplish this task?
To properly end baseboard trim at stairs, some essential tools and materials are required. These include a measuring tape, miter saw, coping saw, finish nails, a nail gun or hammer, wood filler, sandpaper, and a caulk gun.
For beginners, it is crucial to first measure and cut the baseboard trim accurately using a miter saw. The ends of the trim should be cut at a 45-degree angle, ensuring they fit snugly against the corners of the stairs. Next, the coped ends should be created using a coping saw to match the profile of the adjoining trim piece. Once cut, the trim can be attached to the stairs using finish nails and a nail gun. Any gaps or nail holes should be filled with wood filler, sanded, and painted for a seamless finish. Finally, a caulk gun can be used to apply caulk along the edges of the trim to further ensure a polished appearance.