How to Cut Baseboard Miter Saw
To cut baseboard using a miter saw, first, measure and mark the desired length of the baseboard.
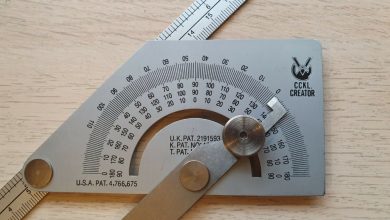
Then, set the miter saw to the appropriate angle for the joint you are making, such as 90 degrees for a butt joint or 45 degrees for a miter joint.
Place the baseboard on the miter saw table, align the marked line with the correct angle on the saw, and hold the baseboard firmly against the fence.
Activate the saw and make the cut.
Repeat this process for any additional cuts needed.
Remember to wear safety goggles and ear protection, keep your hands clear of the blade, and secure the saw properly before use.
Check this out:
Did You Know?
1. The first miter saw was invented by a German engineer, Edmond Zumstein, in 1886. It was initially used for cutting metal, but it eventually found its way into woodworking, including cutting baseboard.
2. A miter saw is also commonly referred to as a chop saw or a drop saw, reflecting its ability to make precise and quick crosscuts.
3. When cutting baseboard with a miter saw, it is recommended to use an 80-tooth or higher-quality blade. This helps ensure cleaner cuts and reduces the chance of splintering the wood.
4. The baseboard should always be positioned with the finished side facing down when using a miter saw. This minimizes potential damage to the visible surface, as any minor splintering or imperfections will be hidden against the wall.
5. In order to achieve the best results when cutting baseboard, it is important to use a miter saw with a laser guide. This helps ensure accurate alignment and allows for precise cuts, resulting in a more professional and seamless finish.
Butt Joint
The butt joint is a commonly used method for joining two baseboards together in a straight line, such as along a wall. To create a butt joint, the ends of the baseboards are cut at a 90-degree angle and then joined together.
To cut a baseboard for a butt joint, follow these steps:
- Measure and mark the desired length for the cut.
- Set the miter saw at a 90-degree angle.
- Place the baseboard on the saw table, aligning the marked line with the correct angle on the saw.
- Hold the baseboard firmly against the fence.
- Activate the saw to make the cut.
- Repeat the process for any additional cuts needed.
When joining the baseboards together, ensure a tight fit by using a nail gun or adhesive to secure the pieces. Before permanently attaching the baseboards, use a level to check for straightness and make any necessary adjustments. With careful measurement and cutting, a clean and seamless butt joint can be achieved.
Miter Joint
The miter joint is commonly used for creating corners with baseboards. This joint involves cutting the ends of two baseboards at a 45-degree angle and connecting them to form a corner. The miter joint not only enhances the visual appeal but also provides a professional finish.
To cut a baseboard for a miter joint, follow these steps:
- Measure and mark the desired length for the cut.
- Set the miter saw at a 45-degree angle.
- Place the baseboard on the saw table, aligning the marked line with the correct angle on the saw.
- Hold the baseboard firmly against the fence.
- Activate the saw to make the cut.
Repeat the same process for the second baseboard, making sure to cut the angles in opposite directions to create a corner.
During the joining process, it is important to ensure a tight fit by using either a nail gun or adhesive. To validate the accuracy of the angles, place the pieces together to create the corner. If necessary, make any adjustments to achieve a precise fit.
Coped Joint
The coped joint is commonly used for joining baseboards that meet at an inside corner. This technique involves cutting one baseboard at a 45-degree angle and using a coping saw to remove material from the back of the other baseboard. By doing this, a precise fit is achieved, allowing the baseboards to sit flush against each other.
To cut a baseboard for a coped joint, follow these steps:
- Measure and mark the desired length for the cut.
- Set the miter saw at a 45-degree angle.
- Make a straight cut on one of the baseboard ends.
- Use a coping saw to carefully remove material from the back of the other baseboard, following the contour of the profile of the first baseboard.
- Sand the coped joint for a smooth finish.
When joining the coped baseboard to the straight cut baseboard, ensure a tight fit by using a nail gun or adhesive. The coped end should slide snugly against the straight cut end, creating a seamless fit.
Scarf Joint
The scarf joint is a useful technique for joining longer baseboards that cannot be accommodated by a single board. This joint involves cutting the ends of two baseboards at a 45-degree angle and overlapping them to achieve a seamless joint. By using the scarf joint, it is possible to create a continuous piece of baseboard without any visible seams.
To create a scarf joint, follow these steps:
- Measure and mark the desired length for the cut on both baseboards.
- Set the miter saw at a 45-degree angle and proceed to make the cuts on each baseboard.
- Ensure that the angled ends overlap correctly when positioned.
- Apply adhesive to the overlapping area and secure the joint tightly using clamps.
It is crucial to note that achieving a seamless appearance with the scarf joint requires precise cutting and careful alignment. After the adhesive has dried, sand the joint to achieve a smooth finish before painting or staining.
Steps to Cut a Baseboard Using a Miter Saw
Cutting a baseboard using a miter saw requires careful measurement and attention to detail. Here are the steps to follow:
- Measure and mark the baseboard at the desired length for the cut.
- Set the miter saw at the appropriate angle for the type of joint you are making. For example, set it to 90 degrees for a butt joint, or 45 degrees for a miter joint.
- Place the baseboard on the miter saw table and align the marked line with the correct angle on the saw.
- Hold the baseboard firmly against the fence and activate the saw to make the cut.
- Repeat the process for any additional cuts needed.
Remember to double-check the angle settings and measurements before making any cuts to ensure accuracy. It may be helpful to practice on scrap pieces of baseboard before working on the actual installation.
Safety Tips
When using a miter saw, safety should always be the top priority. Here are some important tips to keep in mind:
- Wear safety goggles and ear protection to safeguard your eyes and ears from debris and loud noises.
- Never place your hands near the blade. Instead, use a push stick or clamp to hold small pieces securely. Avoid using your hands to hold the baseboard while cutting.
- Ensure that the miter saw is securely fastened to the workbench or stand to prevent any movement or accidents.
- Maintain a stable stance and be mindful of your body position while operating the saw.
- Keep the work area clean and free of clutter to prevent tripping hazards or interference with the saw.
- Always follow the manufacturer’s instructions and guidelines for the safe operation of the miter saw.
By adhering to these safety tips, you can minimize the risk of accidents and injuries while using a miter saw to cut baseboards.
Frequently Asked Questions
How do you cut a baseboard saw?
To cut a baseboard saw, begin by marking the area where it will meet the other piece of the outside corner using a try square or combination square against the wall surface. Then, utilize a miter box or power miter saw to make a precise 45-degree angle cut on the baseboard. Finally, to connect the corner seamlessly, secure it with either 1.25-inch or 1.5-inch brads. This method ensures a clean and professional look for your baseboard installation.
What is the miter angle for baseboards?
To achieve a tight fit when joining baseboards, it is recommended to set the miter angle to 45 degrees. It is important to cut each miter slightly longer than necessary, around 1/16-inch, to ensure a proper fit. Once the boards are cut, they can be placed against the wall and the join can be inspected for a seamless connection.
1. What are some tips and tricks for achieving precise cuts on baseboard molding using a miter saw?
To achieve precise cuts on baseboard molding using a miter saw, there are several tips and tricks you can follow. Firstly, ensure that your miter saw is properly calibrated and set at the correct angles. This will ensure that your cuts are accurate and in line with your desired measurements. Additionally, measure the length of the baseboard molding carefully and mark the cut line clearly before you start cutting. Using a sharp blade and making slow, controlled cuts will also help in achieving precise and clean cuts. Lastly, make sure to hold the molding firmly against the miter saw’s fence and use clamps if necessary to prevent any movement or slipping during the cutting process.
In conclusion, achieving precise cuts on baseboard molding with a miter saw involves proper calibration, accurate measurements, sharp blade, slow and controlled cuts, and securely holding the molding in place. By following these tips and tricks, you can ensure clean and precise cuts for your baseboard molding installation.
2. Are there any specific safety precautions one should take when using a miter saw to cut baseboard molding?
Yes, there are specific safety precautions that should be taken when using a miter saw to cut baseboard molding. First and foremost, it is important to wear appropriate safety gear such as safety goggles and ear protection to protect your eyes and ears from any flying debris or loud noise. Additionally, it is crucial to keep your hands a safe distance away from the blade by using a push stick or clamp to hold the baseboard securely in place. Finally, make sure to keep the work area clear of any obstructions or loose materials that could interfere with the cutting process. Following these safety precautions will help ensure a safe and successful use of the miter saw when cutting baseboard molding.