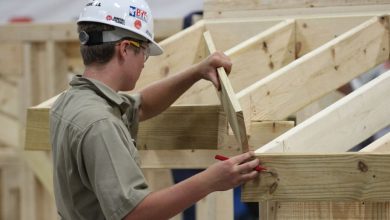
How to Take Off Baseboards
To take off baseboards, start by cutting any caulk along the baseboard.
Then, use an EdgeWedge pry bar to wiggle and pry the board away from the wall.
Carefully pull one end out from the wall and rock the trim back and forth to release it.
Label each piece for reinstallation and continue the process until all pieces are removed.
Be cautious of hazards such as lost nails and use side-cutter pliers to remove finishing nails.
If there is adhesive left on the wall, an EdgeWedge tool can be used to scrape it away.
It is recommended to have a second person help if the baseboard is very long, and if the baseboards won’t be reused, they can be disposed of promptly.
Check this out:
Did You Know?
1. Did you know that baseboards were originally designed to conceal the gap between the wall and the uneven floor in older buildings? Their purpose was both functional and aesthetically pleasing, as they provided a clean finish and protected walls from damage.
2. Taking off baseboards can sometimes reveal historical discoveries. People have found hidden messages or objects concealed behind baseboards, such as old letters, newspapers, or even long-forgotten treasures.
3. Baseboards are known by various names around the world. In the United Kingdom and Australia, they are commonly referred to as “skirting boards,” while in North America, they are more commonly known as “baseboards” or “base moldings.”
4. The height and style of baseboards have changed throughout history. In ancient Roman architecture, baseboards were typically low and plain, serving merely as a simple border between the wall and the floor. In contrast, during the Victorian era, ornate and elaborate baseboards became fashionable, showcasing intricate designs and patterns.
5. Removing baseboards requires caution and skill to avoid damaging the walls or the trim itself. To make the process easier, it’s recommended to use a putty knife or a flat pry bar to gently separate the baseboard from the wall. Additionally, heating the baseboard with a hairdryer can help soften the adhesive or caulk, making it easier to remove.
Introduction: Challenges Of Removing Baseboards And Trim Without Damage
Removing baseboards and trim can be a daunting task, especially if you’re concerned about causing damage to the walls, wallpaper, or paint. The process often involves a lot of wiggling, prying, and pulling, which increases the risk of accidental scrapes and marks. However, with the right tools and techniques, you can successfully remove baseboards and trim without any damage.
Here are some tips to help you remove baseboards and trim safely:
-
Gather the necessary tools: Before you begin, make sure you have the right tools for the job. This includes a putty knife, a pry bar, a hammer, and a utility knife.
-
Protect the walls: To prevent accidental damage to the walls, place a piece of scrap wood or a thin metal sheet between the pry bar and the wall. This will act as a buffer and help distribute the pressure evenly.
-
Start at the seams: Look for the seams where the baseboards or trim pieces meet. These are usually the easiest points to start removing them from. Insert the putty knife or the pry bar into the seam and gently apply pressure to lift and loosen the piece.
-
Work slowly and carefully: Take your time when removing the baseboards and trim. Use a back-and-forth motion with the pry bar to gradually separate the piece from the wall. Avoid using excessive force, as this can cause damage to the surrounding areas.
-
Use a utility knife: If the baseboards or trim are caulked or painted over, you may need to score the edges with a utility knife before attempting to remove them. This will help break the seal and make the removal process easier.
-
Clean up any residue: Once the baseboards and trim are removed, there may be residue left behind. Use a scraper or sandpaper to gently remove any adhesive, paint, or caulk from the walls.
Remember, patience and care are key when removing baseboards and trim. By following these tips and using the right tools, you can successfully complete the task without causing any damage.
The Edgewedge Pry Bar: A Damage-Free Solution
One tool that stands out in the realm of baseboard removal is the EdgeWedge pry bar. This innovative tool is specifically designed to remove baseboards and trim without causing any damage. The EdgeWedge pry bar features beveled edges made of tough, flexible plastic, which ensures a smooth and effortless removal process.
Features Of The EdgeWedge Pry Bar
The EdgeWedge pry bar is the ultimate tool for baseboard removal with its unique features. Its beveled edges allow for smooth sliding back and forth without damaging the walls or baseboard. This eliminates the risk of unsightly marks or scratches during the removal process.
One standout feature of the EdgeWedge pry bar is that its heads can be sharpened with a file to create thinner edges. This proves useful when dealing with stubborn baseboards or trim. By sharpening the edges, you can easily access tight spaces and effectively leverage the pry bar.
Moreover, the EdgeWedge pry bar set is highly durable and built to last. Its sturdy construction ensures that it can withstand the rigors of baseboard removal without bending or breaking. Investing in this tool will not only make your current project a breeze but also guarantee years of reliable use.
Easy And Effective Steps To Remove Baseboards And Trim
To successfully remove baseboards and trim, follow these easy and effective steps:
-
Begin by cutting any caulk along the baseboard using a utility knife. This will help loosen the bond between the wall and the baseboard, making it easier to remove.
-
Next, take your EdgeWedge pry bar and position it at one end of the baseboard. Use a gentle rocking motion to wiggle the pry bar into the small gap between the wall and the baseboard. Be careful not to use too much force, as this could cause damage.
-
Once the pry bar is wedged underneath the baseboard, slowly and carefully pull one end out from the wall. Apply even pressure and continue rocking the trim back and forth to release it from any remaining adhesive or nails.
-
As you remove each piece, make sure to label them for easy reinstallation later. This will save you time and frustration when it comes to putting everything back together.
-
Repeat this process for all the baseboards and trim until they are completely removed.
-
Cut caulk along the baseboard
- Use a gentle rocking motion with a pry bar
- Label each piece for easy reinstallation
Additional Tools And Precautions For A Smooth Removal Process
While the EdgeWedge pry bar is the star of the show when it comes to baseboard removal, there are a few additional tools and precautions that can further enhance your experience:
-
Side-cutter pliers can be used to remove any finishing nails that may be stuck in the baseboards. This prevents damage to the walls or the baseboard itself when pulling them out.
-
Be cautious of hazards such as lost nails while removing the baseboards. Clear the area regularly to avoid stepping on or damaging yourself with sharp objects.
-
If there is any adhesive residue left on the wall after baseboard removal, an EdgeWedge tool can be used to scrape it away gently. Be careful not to apply too much pressure, as this may damage the paint or wallpaper.
-
If the baseboard is exceptionally long, it’s recommended to have a second person assist you. This will help prevent the baseboard from snapping in half during removal, ensuring a smoother and safer process.
Disposing Of Baseboards: What To Do With Unwanted Pieces
Once you have successfully removed the baseboards and trim, you may wonder what to do with the unwanted pieces. If you have no intention of reusing them, one option is to dispose of them promptly.
- Take them to a local recycling facility or contact your waste management service to inquire about the proper disposal methods.
Recycling the baseboards not only reduces environmental impact but also clears up space for future renovation projects.
“Removing baseboards and trim can be a challenging task, but with the right approach, it can be done without causing any damage.”
Frequently Asked Questions
What is the best tool to remove baseboards?
The best tool to remove baseboards is the Trim Puller. This innovative tool is specifically designed to safely and efficiently remove baseboards, molding, door casings, and decorative panels without causing any damage to the trim or the wall. Unlike other methods that may require the use of a shim or small board spacer, the Trim Puller eliminates the need for such additional tools, simplifying the process and making it easier to remove baseboards with precision and without any hassle.
How do you remove baseboards without damaging plaster?
To remove baseboards without damaging plaster, one effective technique is to use a putty knife instead of a traditional pry bar. Start by placing the putty knife behind the trim and gently wiggle it while gradually pulling it towards you, taking care not to apply excessive force. As you continue along the length of the baseboard, repeat this process until the board becomes completely detached from the wall. This method helps prevent any accidental damage to the surrounding plaster while successfully removing the baseboard.
Do baseboards need to be removed?
While it is not necessary to remove baseboards for most flooring applications, opting to do so can provide an opportunity to customize the look of your remodel. Removing and replacing baseboards allows for adjustments in height and style, giving you the chance to switch to a different aesthetic that complements your new flooring. This can enhance the overall appearance and cohesiveness of your space, making it a worthwhile consideration during the installation process.
Are baseboards necessary?
Yes, baseboards are necessary as they serve as a crucial barrier against water damage. Given the vulnerability of drywall to moisture, baseboards play a crucial role in protecting it. Without baseboards, any spills or water on the floor can easily seep into the drywall, leading to extensive and unsightly damage. Therefore, baseboards provide a layer of protection, preventing water from expanding upwards and ensuring the longevity of the walls.