What Grit Sand Paper for Cabinets
The recommended grit sandpaper for cabinets is 100 or 150-grit.
This grit level is sufficient to roughen up the surface of the cabinets, ensuring that the cabinet paint adheres properly.
It is not necessary to remove the prior finish completely, just roughen up the surface.
After sanding, make sure to wipe off all dust with a damp cloth before proceeding with painting.
Did You Know?
1. Did you know that the grit size of sandpaper for cabinets ranges from 80 to 220? This range allows you to select the appropriate level of coarseness for the specific task at hand, such as removing paint or achieving a smooth finish.
2. In the United States, the “grit” measurement on sandpaper refers to the number of abrasive particles per square inch of the paper. So, a higher grit number indicates a finer and less abrasive paper.
3. Interestingly, sandpaper wasn’t always made from sand. In ancient times, craftsmen used crushed seashells, pumice stone, or even shark skin to create abrasive surfaces for smoothing wood.
4. Cabinetmakers often employ a technique known as “progressive grits.” This involves starting with a coarser grit sandpaper, such as 80 or 100, to remove rough surfaces or existing finishes. They then move through progressively finer grits, ensuring a smoother and more refined surface before applying a new finish.
5. Sandpaper can actually be used for more than sanding wood. It is also commonly used in various art forms, including sculpting, printmaking, and even as an alternative medium for drawing. Artists utilize different grits of sandpaper to create unique textures and effects in their artworks.
Importance Of Proper Cabinet Prep
Preparing cabinets properly is crucial to achieving a successful and long-lasting repainting job. Many people make the mistake of skipping this step or not paying enough attention to it, leading to paint that easily chips or peels off. Proper cabinet prep work ensures that the new paint adheres well and creates a smooth, durable finish.
One key step in this process is sanding the cabinets with the appropriate grit sandpaper.
- The importance of proper cabinet prep work cannot be stressed enough
- Skipping this step can result in paint that easily chips or peels off
- Properly preparing cabinets ensures that the new paint adheres well
- Sanding with the appropriate grit sandpaper is a key step in the process
Step 1: Clean And Dry Cabinets
Before starting the sanding process, it is important to ensure that the cabinets are thoroughly clean and dry. Any grease, grime, or dust on the surface can affect how well the paint adheres and the overall appearance of the finished project.
To clean the cabinets, use a gentle grease remover and a damp sponge. Wipe down the cabinets, paying special attention to areas that are prone to build-up, such as the handles and edges.
After cleaning, allow the cabinets to fully dry before proceeding to the next step.
- Ensure cabinets are clean and dry before sanding
- Use gentle grease remover and damp sponge for cleaning
- Pay special attention to areas prone to build-up
- Allow cabinets to fully dry after cleaning
Step 2: Removing Grease And Grime
One of the most common challenges when it comes to repainting cabinets is dealing with the accumulation of grease and grime over time. This can be especially prevalent in kitchen cabinets due to cooking oils and food residue. To remove stubborn greasy build-up, opt for a grease remover specifically designed for kitchen surfaces. Apply the cleaner to a sponge and gently scrub the cabinets, ensuring that all areas are thoroughly cleaned.
Afterward, wipe down the cabinets with a damp cloth to ensure that all residues are removed.
- Use a grease remover specifically designed for kitchen surfaces
- Apply the cleaner to a sponge and gently scrub the cabinets
- Wipe down the cabinets with a damp cloth to remove residues.
Step 3: Sanding For Better Adhesion
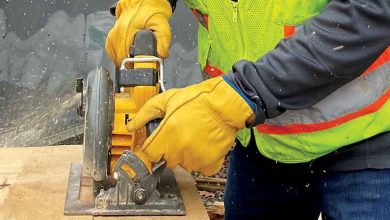
Once the cabinets are clean and dry, it is time to roughen up the surface using sandpaper. Sanding helps the paint adhere better and gives the cabinets a smooth, even finish. The grit of the sandpaper to use for this step is crucial. A 100 or 150-grit sandpaper is generally recommended for cabinets. This grit is coarse enough to remove any glossy sheen or previously applied finish, but not too rough that it damages the surface. Keep in mind that the goal is not to remove all of the previous finish but to create a slightly roughened surface for the new paint to grip onto. Sand in circular motions, paying attention to any grooves or edges. Once done, wipe off all the dust with a damp cloth to ensure a clean surface before painting.
Step 4: Preparing The Kitchen For Painting
Before embarking on the actual painting process, it is essential to properly prepare the rest of the kitchen. Cover countertops and other surfaces with plastic or a drop cloth to protect them from paint splatters or drips. Use painter’s tape to secure the edges and borders of the cabinets, ensuring that nearby walls, appliances, or fixtures are not accidentally painted. Taking the time to prepare the kitchen will not only prevent messy accidents but also ensure a more professional-looking final result.
In conclusion, proper preparation is the key to achieving a successful cabinet repainting job. Cleaning and drying the cabinets thoroughly, removing grease and grime, using the appropriate grit sandpaper to roughen up the surface, and properly preparing the surrounding kitchen area are all crucial steps in this process. By following these guidelines, you can ensure that your cabinets receive the necessary prep work to achieve a flawless and durable finish.
So, the next time you plan to tackle a cabinet repainting project, remember the importance of using the right grit sandpaper for the best results.
- Cover countertops and other surfaces with plastic or a drop cloth
- Use painter’s tape to secure the edges and borders of the cabinets
Check this out:
Frequently Asked Questions
What sand paper do I use to sand cabinets?
To achieve smooth and polished cabinets, it is recommended to use fine 220-grit sandpaper or a sanding block. This particular grit size is ideal for effectively removing any imperfections or roughness on the surface without causing excessive damage or scratching the cabinets. The fine grit allows for a controlled and gentle sanding process, resulting in a clean and flawless finish when renovating or refinishing your cabinets.
What grit sandpaper for cabinets before staining?
Before staining cabinets, it is important to prepare the wood by sanding it with the appropriate grit sandpaper. Begin by wiping away any dust particles and then proceed to sand with a finer sandpaper, such as 220 grit. This will help create a smooth surface and ensure that the wood is ready to absorb the stain effectively. Additionally, rubbing the stain into the wood with a rag, following the direction of the grain, allows for deeper saturation and better penetration into the wood’s pores.
Can I use 320 grit sandpaper for cabinets?
Using 320 grit sandpaper for cabinets is not recommended. While it is suitable for lightly sanding the surfaces between coats to achieve a smoother finish, this type of sandpaper may not provide the desired results for the main sanding process. It is best to use a coarser grit sandpaper, such as 120 or 150, to properly prepare the cabinet surfaces before painting. This ensures that any existing imperfections or roughness are adequately smoothed out, allowing for a better adhesion of the paint and a more professional-looking finish.
What grit sandpaper for laminate cabinets?
To achieve optimal results when sanding laminate cabinets, it is recommended to use 120 grit sandpaper. Whether utilizing a sander or sanding by hand, ensure that the entire surface, including the edges, is adequately sanded. The primary purpose is to create numerous tiny scratches on the laminate, providing a suitable textured surface for paint adhesion.